Want photos from your Android that look like they came off a DSLR? You can. Modern phones are insanely capable — but getting that “DSLR look” means understanding optics, exposure, and workflow, not just tapping a filter.
This article walks you through why DSLRs look different, what phone limitations are, and exactly how to bridge the gap: hardware, software, shooting techniques, editing workflow, accessories, and sample settings for real scenarios.
TL;DR.
- Shoot in RAW or RAW+JPEG.
- Use a camera app with full manual controls (ISO, shutter, focus, white balance, RAW) and understand to manage them in different scenarios.
- Get close to your subject + maximize subject-background distance to create shallow depth of field.
- Use longer focal lengths (digital zoom carefully, clip-on lenses carefully) to compress perspective.
- Control light: use golden hour, reflectors, or off-camera LED for professional results.
- Edit RAW (exposure, shadows, highlights, color grading, selective sharpening) in apps like Lightroom Mobile.
- Stabilize with tripod/gimbal for long exposures or low light.
1 — Why DSLRs Look Different (The Fundamentals).
To convincingly emulate a DSLR, understand what DSLR images usually give you:
- Large sensor → better dynamic range & low-light performance. Bigger sensors capture more light and detail and allow cleaner high-ISO shots.
- Large aperture lenses → shallow depth of field (DoF) and smooth bokeh. Wide apertures (f/1.4–f/2.8) isolate subjects and blur backgrounds.
- Interchangeable optics → control over focal length & perspective. Telephoto and prime lenses give different looks.
- Optical quality and character. Glass elements, coatings, and lens design create pleasing micro-contrast and “pop.”
- Manual controls and RAW flexibility. DSLRs empower photographers to dial in exposure and process RAW files with latitude.
Smartphones compensate with computational photography (multi-frame blending, AI denoising, synthetic bokeh). Your job: combine phone hardware + deliberate shooting + manual control + smart editing to approximate DSLR aesthetic.
2 — Hardware: Make the Most of Your Android.
You can’t change the sensor, but you can choose and use hardware wisely.
Phone Selection (If You’re Picking One Now):
- Prefer phones with larger sensors, telephoto or periscope lenses, and optical image stabilization (OIS).
- Phones that expose RAW from multiple lenses are ideal (main + telephoto).
- Look for a phone that supports Pro/Manual mode and saves true RAW (DNG).
(If you already own a phone, skip to settings & techniques below.)
Useful Accessories:
- Tripod (small tabletop or full-size) — essential for long exposures and low-light.
- Clip-on lenses (telephoto/macro) — use only high-quality ones; cheap clamps degrade image quality.
- External LED light / portable flash / reflector — to shape light.
- Gimbal — for motion/stabilized video/creative long exposures.
- Remote shutter or self-timer — to avoid shake.
3 — Camera App & Settings: Use Manual Control.
Default camera apps are OK, but pros prefer apps that expose full controls and shoot RAW.
Must-Have Features in a Camera App:
- RAW capture (DNG).
- Manual control: ISO, shutter speed, aperture (if phone has variable aperture or multiple lenses), manual focus, and white balance.
- Exposure lock, histogram, and zebras (overexposure warnings).
- Choose an app that lets you pick which lens (wide/main/tele) to save RAW from.
Popular pro apps (examples — pick one that works for your phone): ProCam-like apps, Open Camera (free & powerful), Filmic Pro (video), and dedicated manufacturer Pro modes.
Core Settings Explained:
- Shoot RAW whenever you can — it preserves highlight and shadow detail.
- ISO: keep ISO as low as possible for clean images. Raise only when necessary.
- Shutter speed: faster for action; slower for low light (use tripod).
- Aperture: most phones have fixed aperture; mimic shallow DoF using lens choice and distance.
- Manual focus / focus peaking: essential for macro and low-light.
- White balance: set manually for accurate colors; avoid auto if lighting is mixed.
- Use the histogram to avoid blown highlights and crushed shadows.
4 — Optical Tricks to Create Shallow Depth of Field and DSLR Bokeh.
Phones have tiny sensors, so true shallow DoF is limited. But you can get close.
Techniques:
- Use a longer focal length (telephoto). If your phone has 2x–5x optical zoom, use it. Longer focal lengths compress background and increase background blur for the same framing.
- Get physically closer to the subject. The closer you are, the shallower the DoF. For portraits, move closer and use a longer lens (telephoto crop).
- Increase subject-to-background distance. Put big space between subject and background — even a few meters helps.
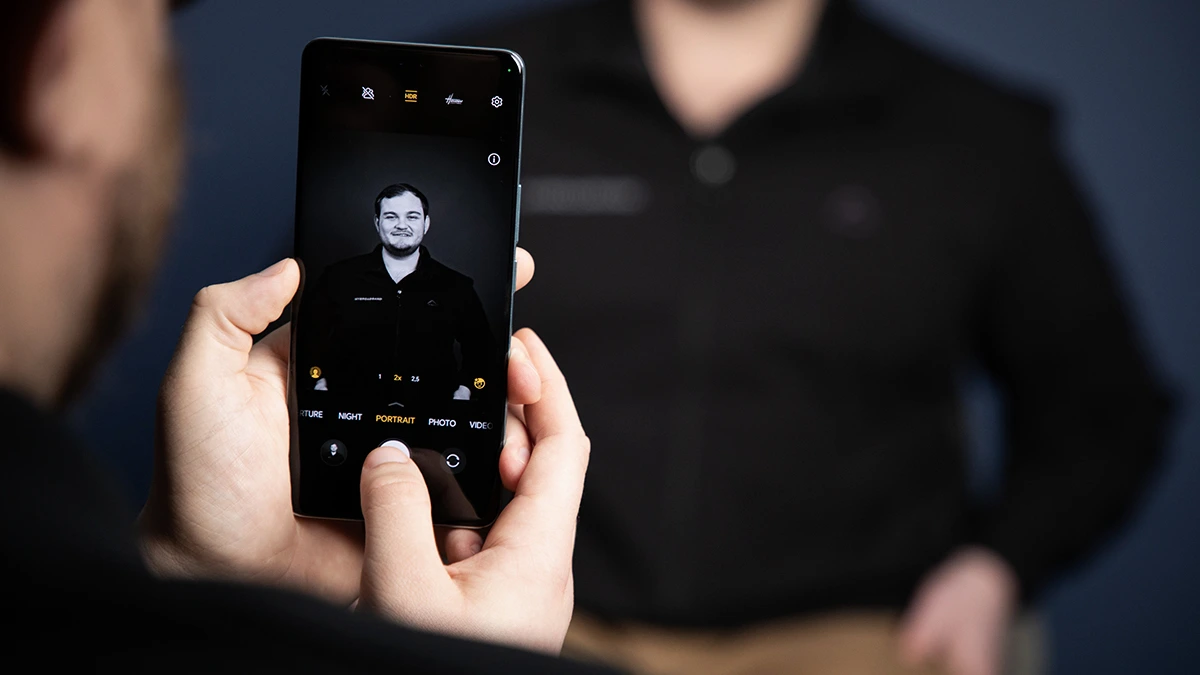
- Use portrait mode intelligently. Phone portrait modes are great but check and correct edge detection errors in post. Prefer synthetic bokeh only when you can’t get optical blur.
- Background selection matters. Busy, specular highlights produce attractive bokeh circles; plain backgrounds won’t “look DSLR” no matter what.
- Use third-party lenses (quality ones) for stronger blur or unique bokeh shapes — but test for vignetting and softness.
5 — Composition & Light: The Non-Negotiables.
A DSLR look is as much about composition and light as about blur.
Composition Tips:
- Rule of thirds, leading lines, framing, negative space, symmetry — always consider these.
- Fill the frame for subject isolation; crop consciously but don’t overcrop (retain pixels for quality).
- Use foreground elements to add depth.
- Avoid distracting highlights directly behind the subject unless you use them intentionally (rim light).
Lighting: Make it Flattering.
- Golden hour (sunrise/sunset) gives soft warm light — easy DSLR look.
- Use reflectors (white paper, silver foam core) to fill shadows on the face.
- Backlight + rim light: place sun behind subject, expose for face, and use fill. Creates separation like pro portraits.
- For hard light, use diffusers to soften it; for low light, use off-camera LED to simulate a strobe.
6 — Exposure Triangle & Metering for Phone Photography.
Understanding exposure is essential.
- Aperture: mostly fixed on phones — change the look via distance and lens choice.
- Shutter speed: controls motion blur. Use >1/125s for handheld portraits; faster for motion. For low light or artistic motion, use tripod and slower speeds.
- ISO: raising ISO brightens but adds noise. Edit RAW to recover shadow detail rather than exploding ISO when possible.
Metering Strategy:
- Spot metering on the subject’s face for portraits.
- Expose to the right (ETTR): when safe, expose slightly brighter (without clipping highlights) to preserve shadow detail; pull down exposure in RAW later.
7 — Post-Processing: Turning a Good Shot into a Great One.
RAW editing is where phone photos really gain DSLR-like polish.
Essential Workflow (in order):
- Crop & straighten — finalize composition.
- Exposure & contrast — adjust exposure, shadows, highlights. Use curves if available.
- White balance & tint — set natural skin tones or stylize.
- Noise reduction — done selectively; reduce noise in shadows but preserve detail.
- Sharpening & texture — apply modest sharpening to main subject; avoid over-sharpening skin.
- Color grading — adjust HSL (hue, saturation, luminance) for selective color control.
- Local adjustments — dodge & burn faces, brighten eyes, add clarity to eyes/hair.
- Lens corrections & perspective — correct distortion if using clip-on lens.
- Export as high-quality JPEG or keep DNG for long-term.
Recommended Mobile Tools:
- Adobe Lightroom Mobile — RAW editing, selective adjustments, profiles.
- Snapseed — easy local tools and healing.
- VSCO or RNI Films — film-like color presets if you want a specific look.
- TouchRetouch — remove distractions.
(No app is mandatory — the important part is RAW editing and local adjustments.)
8 — Advanced Techniques (for enthusiasts).
Focus Stacking for Shallow DoF in Macro.
Take multiple frames with slightly different focus points, then stack in desktop software for increased DoF (macro) or simulated focal plane control.
Exposure Bracketing & HDR Blending.
Capture multiple exposures (±1–2 EV) and blend to get DSLR-like dynamic range without blown highlights.
Long Exposure Motion Blur.
Use ND filters or long exposures on tripod for smoothing water, light trails, etc.
Astro & Night Sky.
Use a tripod, wide lens (if available), high ISO (but keep noise in control), and try star-tracking apps for stacking images.
9 — Scene-Specific Settings & Recipes.
Here are practical starting points. These are guides — adjust to taste.
Portraits (head & shoulders):
- Lens: telephoto if available (2x–3x optical).
- Mode: Pro/Manual + RAW.
- Shutter: 1/125 – 1/250s (handheld).
- ISO: lowest possible (100–400).
- Focus: single-point on the eye.
- WB: set to match light (daylight/flash).
- Tip: use subject-to-background distance and tele focal length for blur.
Full-Body Portraits / Environmental Portraits:
- Shutter: 1/160 – 1/320s.
- Aperture fixed; step back more; keep background interesting.
Landscapes:
- Lens: main wide.
- Mode: RAW; use HDR/Bracketing.
- Shutter: 1/60 – 1/125s (handheld) or tripod for lower.
- ISO: 50–200.
- Tip: shoot at golden hour; use foreground elements; keep horizon straight.
Low Light / Night:
- Use tripod.
- Shutter: seconds (vary widely).
- ISO: as low as possible; use multi-frame noise reduction.
- Use manual focus (autofocus struggles).
- Tip: light painting or long exposure for car trails.
Street Photography:
- Shutter: 1/250 – 1/1000s for action.
- Aperture: n/a (phone fixed); keep ISO reasonable.
- Tip: zone focus or AF-C for unpredictable movement.
Macro:
- Use dedicated macro lens or telemacro mode.
- Use tripod, manual focus, and small micro-movements.
- Shutter: as fast as lighting allows; if handheld, increase ISO and accept noise tradeoff.
10 — Practical On-Shoot Checklist.
Before each shoot:
- RAW enabled.
- Battery charged.
- Clean lens (wipe glass).
- Tripod/reflector/LED ready.
- Meter/histogram visible.
- Focus peaking enabled if available.
11 — Common Mistakes and How to Fix Them.
- Relying only on portrait mode: it’s convenient but can produce edge artifacts. Fix with optical blur + manual editing.
- Overexposed highlights: check histogram, use spot metering, or bracket.
- Overprocessing: unnatural skin, halos, or excessive clarity — dial back.
- Too much crop: shoot with highest resolution and avoid aggressive cropping that magnifies noise.
12 — Sample Edit Walkthrough (concise).
- Import RAW to Lightroom Mobile.
- Set white balance and exposure (lift shadows + recover highlights).
- Apply noise reduction at 25–50% for shadows.
- Increase clarity/texture +10 on eyes/hair with selective brush.
- Tone curve: slightly lift shadows and midtones; add a subtle S-curve for contrast.
- HSL: reduce greens or blues if landscape is too saturated.
- Apply slight vignette to draw eye to subject.
- Export high-quality JPEG.
13 — Emulating DSLR “Character”.
- Contrast & microcontrast: add gentle local contrast in midtones (curves).
- Color grading: film profiles (muted greens, warm highlights).
- Bokeh look: combine optical blur + highlight smoothing in post (but avoid fake circular bokeh overlays).
- Skin retouch: subtle clarity reduction + selective sharpening on eyes and lips.
14 — Final Pro Tips & Mindset.
- Practice composition & light first; the rest supports this.
- Treat phone as tool — not limitation. Many pro images come from great light, not just hardware.
- Build a consistent editing preset to speed workflow and achieve recognizable style.
- Study DSLR photos you like — analyze light, lens compression, and color — then replicate on your phone.
- Save RAW originals; you’ll want the latitude later.
- Keep experimenting: telephoto + golden hour + reflector = portrait magic.
FAQ.
Q: Can I get true DSLR shallow DoF on a phone?
A: Not the exact optical shallow DoF of a full-frame f/1.4 lens, but you can get very close visually with tele lenses, proximity, background distance, and selective sharpening/blur in post.
Q: Should I always shoot RAW?
A: Yes for serious shooting. RAW keeps flexibility; shoot RAW+JPEG if you want instant shareable images.
Q: Which app is best?
A: Any app that gives manual controls and true RAW output will work. Learn one app deeply.
Q: Do clip-on lenses help?
A: They can add focal length or macro ability, but quality varies. Buy reputable brands and test for sharpness/vignetting.
Leave a Reply