I hope you get an awesome business WordPress website. But your website isn’t complete if your visitors can’t contact you directly from your Website.
No doubt WordPress is an amazing and leading CMS framework, it powers more than 17 million websites on the entire internet. Please check do you have a dedicated contact page where the user fills details in and make an inquiry?
Without contact form, in place, you may be wasting some serious efforts you put in writing quality content for your website, marketing your product/services on the various social platform and you may have invested a bit on SEO. What’s the use of those efforts when you are not offering an easy way to contact you?
Let’s get the point in user experience context. Consider that I’m offering carpentering service on my website. You searched for carpenter services on Google and landed on my website. You found my services both affordable and accurate. But I have no contact form on my site! What a waste!
It definitely affects the user experience of my site, and I probably lose you as my potential customer. Having a contact email and phone number anywhere would require an off the website effort to contact, and the majority of the user may skip this. Why loose hot prospect?
Any solution to this problem? Well Yes, there is a solution and it’s easy one. Do you get 5 minutes? YES, then you will have a contact form in place in next 5 minutes. Please read on.
We will cover 3 steps to add contact feature in your WordPress website:
- Install Plugin
- Configure Plugin
- Add contact page
Install Plugin:
If you have ever installed any plugin on your WordPress plugin, It’s the same procedure installing this plugin. You just need to search for contactform7 and install the plugin. If you are new to this please follow the below-mentioned procedure.
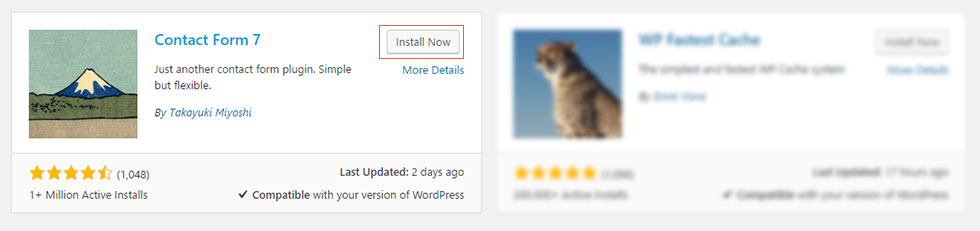
Please, login to your WordPress admin area. Now select the Add New Plugin under the Plugin from left navigation. You will have plugin search bar on the top right corner, search the term “contactform7” and hit the search button.
You should get the result shown in the image above, please hit the install now button. Once installed please press the Activate button. Congratulation you now have installed the contact form 7 plugin.
Configure Plugin:
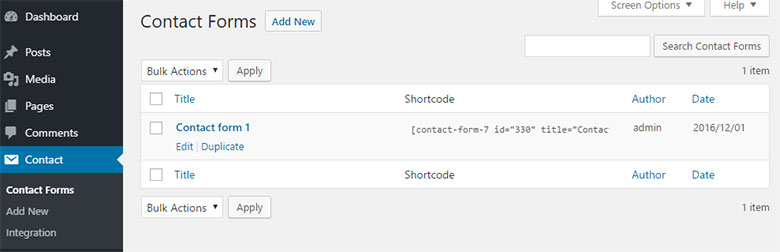
We have installed and activated contact form 7 plugin in the previous section. Now is the time to configure it properly. You should have a Contact navigation link on left side of the admin panel. Please click the Contact Forms under Contact category from navigation. You should see the page like the image above.
This is the area where we will configure 3 different things:
- Form inputs
- Mail configuration and data
- Message data
1. Form Inputs:
Now please hover your cursor over the Contact form 1 and hit the edit link. This should open the configuration page for Contact form 1.
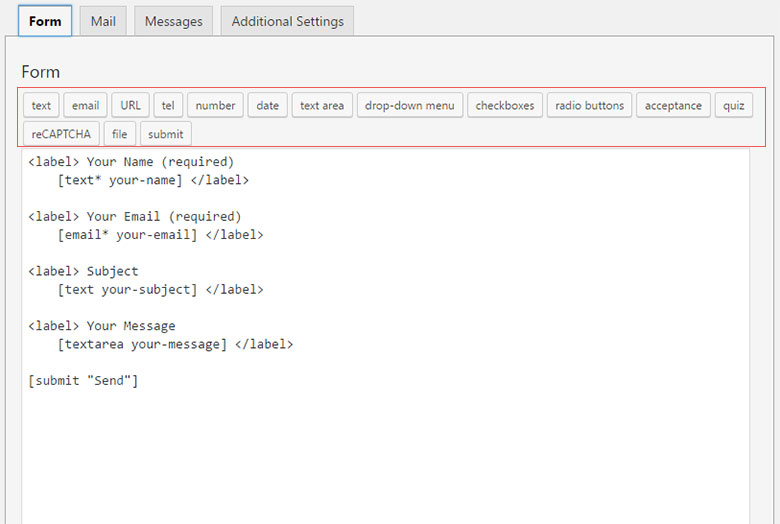
This page specifies the input fields displayed on your contact page. You have control over which fields to show and hide. The best standard practice is not to ask too much question much personal information that one hesitate to share in first place.
Having a name, email, subject and message would serve the inquiry purpose very well with a way for you to contact the prospect and establish the communication channel. These are the default input fields that are pre-filled by the plugin. So if you don’t want to change anything you can relax and move to the next part.
2. Mail:
Please press the Mail tab residing next to the Form tab in the configuration page. It should look something like image below:
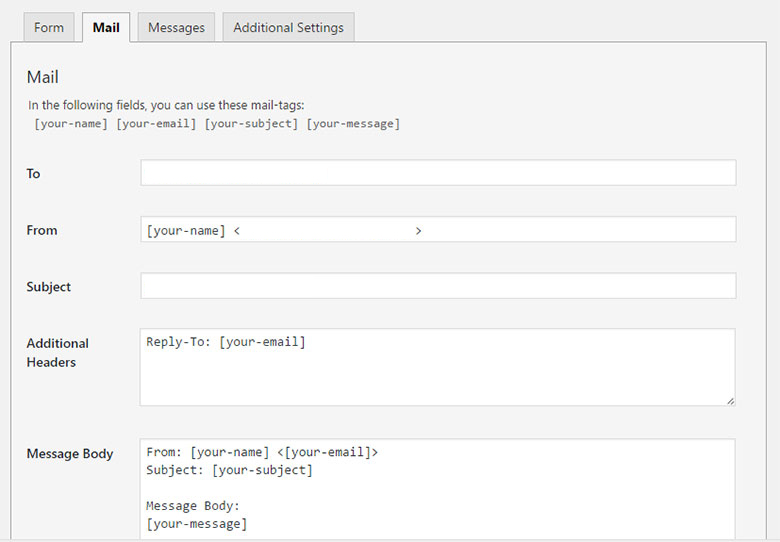
In this tab you just need to change only one field the “To” input field. Please add your email address where you want to receive the inquiry emails. Once changed hit the save button.
All the other fields like From, Subject, headers and message are using the templates which will be replaced by the visitor’s entered inputs. So if don’t really need don’t change them.
3. Message:
Now please click the Messages tab right after the Mail tab, the configuration page should like the image below:
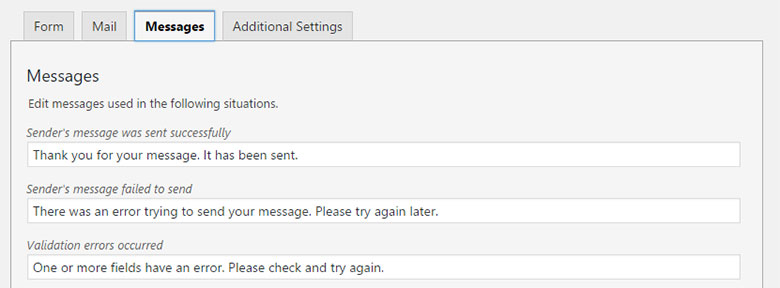
This page specifies the messages we will be showing when a user performs some action with our contact form. We have the option to change the message text for each action mentioned in the page. Once you change the text please don’t forget to hit the save button.
The configuration comes with default place-holding generic texts, they are pretty standard but you can change if you want to be a bit creative with texts.
The actions on which messages appears are like: when the contact form successfully submitted, when there are some mistakes in forms inputs when submission got failure and couple of other actions.
Add Contact Page:
So we are done with the basic configuration of our plugin, now it’s the time to integrate the plugin with your website’s contact page.
How We Do it?
Simple, go to pages from the left navigation. It shows all pages, please find the contact page listing, hover over it and hit the Edit link. If there is no contact page please hit the Add New page button and create a new contact page. Add text that match your contact needs.
Now hit the contact link from the left navigation panel. You will see the contact form 1 in listing hit edit and you will bring into the edit mode. The page should look like the following image:
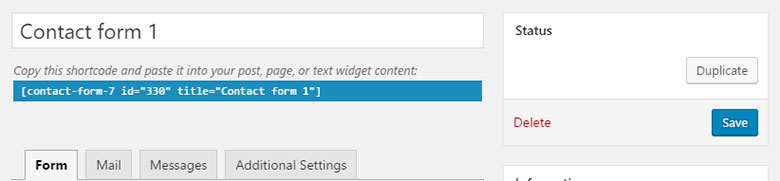
You need to copy the highlighted text shown in your page.
Now open your contact page in edit mode. Add this code at the bottom of the page and hit update or publish button. That’s it!
Now you have a contact page configured the right way. Give this contact page a trial run and make sure you receive the mail message on your preferred account. In most cases, you should.
The beauty here is once someone contacts you, you receive an email and all the further conversation happens on email in a threaded way in most cases. Meaning the use of this contact form is to establish the communication channel between you and your potential buyer.
Conclusion
Having a contact page on your website is crucial. We have a shorter and actionable way how you could achieve it. Follow the three step procedure and equip your site with the widely used contact form on WordPress platform.
Leave a Reply