Building your first home server can transform how you store data, stream media, and manage your digital life. Whether you’re looking to create a personal cloud storage system, set up a Plex media server, or experiment with virtualization, understanding the hardware components is crucial for success.
This comprehensive guide walks you through every hardware consideration you need to know to build a reliable, efficient home server in 2025.
Why build your own home server?
Before diving into hardware specifics, let’s understand why building a custom home server makes sense. Unlike pre-built NAS devices or off-the-shelf solutions, a DIY home server gives you complete control over your hardware choices, easy upgrade paths, and complete customization options.
You can tailor your server to your exact needs, whether that’s maximizing storage capacity, prioritizing power efficiency, or building a virtualization powerhouse.
Custom-built servers also offer better value for money. Desktop components have evolved significantly, now offering tremendous cores and threads, excellent power efficiency, and even ECC memory support—features once reserved for enterprise equipment. This means you can build a professional-grade server using consumer hardware at a fraction of the cost.
Understanding your server’s purpose.
The first step in building a home server is defining its purpose. Your intended use case will dramatically influence your hardware choices:
Media server: If you’re primarily running Plex or Jellyfin for media streaming, you’ll need a CPU with strong transcoding capabilities, moderate storage, and minimal RAM.
File storage and backup: A NAS-focused build prioritizes large storage capacity, RAID redundancy, and power efficiency over raw processing power.
Virtualization lab: Running multiple virtual machines requires a robust CPU with many cores, substantial RAM (64GB or more), and fast storage for optimal performance.
Home automation: Smart home servers need reliability and low power consumption but can run on modest hardware.
All-purpose server: A jack-of-all-trades server needs balanced specifications across all components to handle diverse workloads effectively.
Understanding your primary use case helps prevent over-spending on unnecessary components while ensuring you don’t create bottlenecks in critical areas.
The processor: Your server’s brain.
The CPU is arguably the most important component in your home server build thus the selection must be future proof also. It determines your server’s processing capabilities, power consumption, and long-term performance.
Modern CPU options for home servers:
For home servers in 2025, you have excellent options from both AMD and Intel.
The AMD Ryzen 5 5600 offers an outstanding balance of performance and efficiency with its 6 cores and 12 threads, operating at a conservative 65W TDP. This processor provides plenty of power for virtualization, transcoding, and general server tasks while keeping electricity costs low.
The Intel Core i3-12100F represents the budget-conscious choice, offering 4 cores and 8 threads with Intel’s Quick Sync technology for hardware-accelerated media transcoding. Its power efficiency and lower price point make it ideal for straightforward file serving and media streaming applications.
For users requiring more computational muscle, the AMD Ryzen 9 7900X or 7950X delivers exceptional multi-threaded performance with 12 to 16 cores but with slightly more power consumption (still optimized). These processors excel at running multiple virtual machines simultaneously, handling heavy transcoding workloads, or serving as the foundation for a serious home lab environment.
Power consumption considerations:
Power efficiency matters significantly for home servers since they typically run continuously. A server consuming just 30W more at idle translates to roughly 262 kWh annually, which can add $26-40 to your electricity bill depending on local rates.
Modern processors achieve impressive idle power consumption. Systems built around efficient CPUs like the Ryzen 5 5600 or Intel’s T-series processors can idle between 20-40W while still delivering robust performance under load. When selecting your CPU, pay attention to TDP ratings—generally, CPUs with 65W TDP offer the best balance for 24/7 operation.
Integrated graphics vs. dedicated GPU:
For media server applications, integrated graphics can be a game-changer.
Intel processors with Quick Sync technology offer hardware-accelerated transcoding that significantly reduces CPU load during media streaming.
AMD’s Ryzen processors with integrated Radeon graphics provide similar benefits while also eliminating the need for a discrete graphics card, reducing both cost and power consumption. Reason why most new servers are built with AMD today.
If your server won’t handle media transcoding or you need a discrete GPU for specific applications, you can opt for F-series Intel processors or standard Ryzen models without integrated graphics, which typically cost less.
Motherboard selection: The foundation.
Your motherboard choice impacts everything from expansion options to reliability. For home servers, certain features matter more than others.
Essential notherboard features:
ECC memory support: Error-correcting code memory detects and corrects data corruption. While not strictly necessary for home use, ECC memory adds an extra layer of data integrity protection, especially valuable for file servers and virtualization hosts.
SATA ports: Count your planned drives and ensure your motherboard has sufficient SATA connections. Most modern motherboards offer 6-8 SATA ports, but if you’re building a storage-heavy NAS, you may need additional ports via expansion cards.
M.2 slots: Modern servers benefit from M.2 NVMe slots for boot drives and virtual machine storage. Look for motherboards with at least two M.2 slots—one for your operating system and another for VM storage or caching.
PCIe expansion: Consider future expansion needs. A 10GbE network card, HBA controller for additional drives, or GPU all require PCIe slots. Ensure your motherboard has adequate expansion capabilities.
IPMI/BMC: While less common on consumer boards, integrated lights-out management allows remote server control even when the OS is down. This feature is available on some workstation-class motherboards and is incredibly valuable for headless server operation.
Form factor considerations:
ATX motherboards offer the most expansion options and compatibility with standard cases. MicroATX provides a compact middle ground with decent expansion while saving space. Mini-ITX boards create the smallest possible builds but sacrifice expansion capabilities—typically limiting you to one PCIe slot and fewer SATA ports.
For most home server builders, ATX or MicroATX motherboards offer the best balance of features, expansion options, and availability of compatible cases.
Memory: How much RAM do you need?
RAM requirements vary dramatically based on your server’s purpose. Insufficient memory creates performance bottlenecks and limits your server’s capabilities.
RAM requirements by use case:
Basic file server: 8GB RAM suffices for simple file sharing and light services. However, 16GB provides more headroom and better multitasking capability.
Media server: Plex or Jellyfin generally run well on 16GB, though 32GB allows for more concurrent transcoding streams and better caching.
Virtualization host: Virtual machines are memory-hungry. Start with 32GB minimum, with 64GB or 128GB being ideal for running multiple VMs simultaneously. Each VM needs its own memory allocation, so generous RAM capacity is essential.
Docker/container host: Containers are lighter than VMs but still benefit from ample RAM. 32GB handles most containerized workloads comfortably.
DDR4 vs. DDR5:
In 2025, DDR4 remains a cost-effective choice for home servers, especially when building on older but proven platforms. The price difference between DDR4 and DDR5 has narrowed, but DDR4’s maturity means better availability and sometimes lower latency.
DDR5 offers higher bandwidth and efficiency, making it ideal for newer platforms running memory-intensive workloads. If your motherboard and CPU support DDR5, the investment can future-proof your build, especially for virtualization workloads.
The advent of 128GB DDR5 SODIMM kits for compact motherboards has been revolutionary, allowing mini PC and compact server builds to achieve RAM capacities previously limited to full-size systems.
Storage architecture: Balancing speed and capacity.
Storage decisions make or break a home server. You need to balance capacity, performance, redundancy, and cost while planning for future expansion.
Boot drive selection:
Your operating system drive should prioritize reliability and speed over capacity. A 240-512GB SATA SSD provides adequate space for most server operating systems, including Proxmox, TrueNAS, or Ubuntu Server. These drives are inexpensive and offer dramatically faster boot times compared to mechanical drives.
For enhanced performance, especially in virtualization environments, an NVMe M.2 SSD boot drive delivers significantly faster read/write speeds. A 512GB NVMe drive strikes the ideal balance between cost and capability, with plenty of room for the OS and system services.
Data storage: HDD vs. SSD:
For bulk storage, mechanical hard drives remain the most cost-effective solution. Modern NAS-grade drives like WD Red or Seagate IronWolf are specifically designed for 24/7 operation and offer excellent reliability. A 4TB HDD costs significantly less than a comparable SSD while providing ample space for media libraries, backups, and file storage.
SSDs excel at workloads requiring high IOPS and low latency. They’re ideal for virtual machine storage, databases, and frequently accessed files. However, their cost per gigabyte makes them less practical for mass media storage where sequential read speeds matter more than random access performance.
Hybrid storage strategies:
The most effective home server storage configurations use tiered storage. Install your operating system on a fast NVMe SSD, run virtual machines and containers from SATA SSDs or additional NVMe drives, and store bulk media and backups on large mechanical drives. This approach optimizes both performance and cost-efficiency.
RAID configuration fundamentals:
RAID provides redundancy and performance improvements but adds complexity. Understanding RAID levels helps you make informed decisions about data protection.
RAID 1 (mirroring): Uses two drives with identical data. If one drive fails, your data remains safe on the other. Simple and reliable, but you lose half your storage capacity to redundancy.
RAID 5: Requires three or more drives, using parity data for redundancy. Offers good storage efficiency and can survive a single drive failure. However, rebuild times after drive failure can be lengthy and stressful on remaining drives.
RAID 6: Similar to RAID 5 but with double parity, allowing two simultaneous drive failures. Better for larger arrays where rebuild times increase failure risk.
RAID 10: Combines mirroring and striping for both redundancy and performance. Requires four drives minimum but offers excellent speed and reliability. You lose half your storage to mirroring.
ZFS RAID-Z: Modern file systems like ZFS offer alternatives to traditional RAID with features like data integrity checking, snapshots, and efficient compression. RAID-Z1, Z2, and Z3 provide varying levels of redundancy similar to RAID 5, 6, and beyond.
For home servers, RAID 1 works well for small arrays (2-4 drives), while RAID 10 or ZFS RAID-Z2 suits larger storage pools. Avoid RAID 5 for large drives due to extended rebuild times and URE risks.
SSD considerations for RAID:
While SSDs in RAID configurations offer incredible performance, they come with unique considerations. Consumer SSDs have limited write endurance measured in TBW (terabytes written). RAID operations, especially RAID 5 and 6, generate significant write operations for parity calculations, potentially shortening SSD lifespan.
For SSD RAID arrays, RAID 1 or RAID 10 configurations work better than parity-based RAID 5/6. These mirror-based configurations minimize write amplification while still providing redundancy. Enterprise-grade SSDs with higher endurance ratings are preferable for RAID applications, though they cost significantly more than consumer models.
Many server builders successfully use consumer SSDs in RAID configurations for non-critical data or applications with manageable write patterns. For critical data that changes frequently, enterprise SSDs or mechanical drives in RAID offer better longevity.
Power supply: The unsung hero.
Your power supply doesn’t just deliver electricity—it protects your entire investment. Cheap power supplies can damage expensive components or fail at critical moments.
Calculating power requirements:
Calculate your server’s power needs by adding up component TDPs:
- CPU: 65-125W (typical for home server CPUs)
- Motherboard: 30-50W
- RAM: 3-5W per stick
- Each HDD: 6-10W typical, up to 25W during spin-up
- Each SSD: 2-5W
- Additional cards: 10-30W each
For a typical home server with a Ryzen 5 5600, 32GB RAM, and four HDDs, expect peak consumption around 250-300W during drive spin-up, settling to 150-200W during normal operation.
Sizing your PSU:
Don’t just match your calculated wattage—add overhead. Power supplies operate most efficiently between 20-80% load. A server that peaks at 300W should use a 450-500W PSU for optimal efficiency and longevity.
Additionally, oversizing slightly accounts for power supply aging, future component additions, and ensures stable voltage delivery under varying loads.
Efficiency ratings matter:
80 Plus certification indicates power supply efficiency. Bronze, Silver, Gold, Platinum, and Titanium ratings represent increasing efficiency levels. For 24/7 server operation, Gold or Platinum rated supplies make sense—the improved efficiency quickly offsets their higher cost through reduced electricity consumption.
A Gold-rated PSU typically achieves 90% efficiency at 50% load, while a Bronze-rated unit manages around 85%. Over years of continuous operation, this 5% difference translates to meaningful electricity savings.
Modular vs. non-modular:
Modular power supplies allow you to connect only the cables you need, reducing clutter and improving airflow. For servers, this can significantly improve cooling efficiency and make internal organization easier. Semi-modular units, where main power cables are fixed but peripheral cables are removable, offer a cost-effective middle ground.
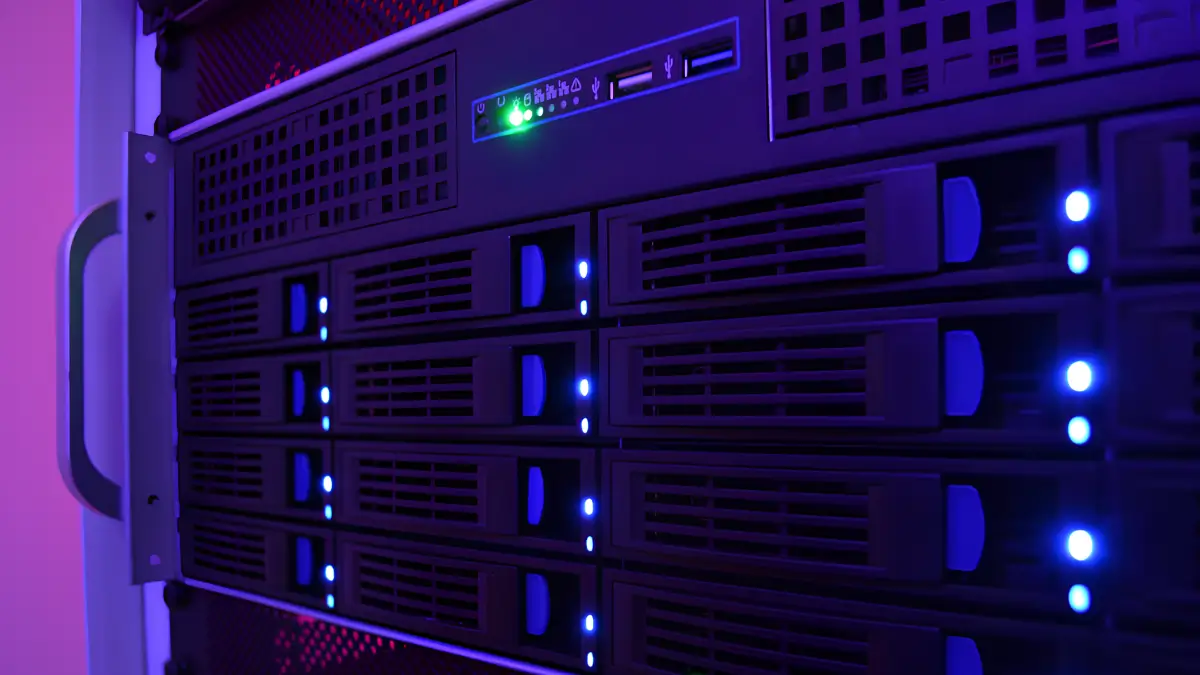
Case selection: Housing your hardware.
Your server case affects cooling, noise levels, expansion capability, and overall system longevity. The right case makes maintenance easier and keeps your components running cooler.
Tower vs. rack mount:
Tower cases resemble traditional desktop computers and work well in home environments. They typically offer good cooling, easy access, and can sit on a floor or desk without special mounting equipment. Tower cases range from compact mini-ITX builds to full tower designs accommodating dozens of drives.
Rackmount cases mount in standard 19-inch equipment racks. They maximize density but generally require dedicated server rack furniture. Rackmount servers work well for serious home labs but can be noisier due to smaller, higher-RPM fans.
For most home users, tower cases offer the best balance of accessibility, cooling, and acoustic performance. Rackmount becomes attractive when managing multiple servers or when space efficiency becomes paramount.
Airflow and cooling:
Effective cooling extends component lifespan and maintains stable performance. Look for cases with front-to-back airflow paths—cool air enters the front, passes over components, and exits the rear.
Cases with mesh front panels allow better intake airflow than solid panels with limited ventilation. Multiple fan mounting positions provide flexibility for optimizing cooling. For home servers, aim for cases supporting at least three 120mm or 140mm fans—two front intake and one rear exhaust establishes baseline airflow.
Larger cases, particularly 4U and tower designs, can accommodate larger fans. A 140mm fan moves more air at lower RPM than smaller fans, reducing noise while maintaining cooling effectiveness. This becomes especially important for servers in living spaces.
Drive bays and expansion:
Count your current drives and add capacity for future expansion. Most tower cases offer 4-8 drive bays for 3.5-inch HDDs. If you plan to build a large storage array, select cases specifically designed for NAS applications with 8-12+ drive bays.
Pay attention to drive bay orientation and tool-less mounting systems. Hot-swap bays allow drive replacement without powering down the server—valuable for maintaining uptime in RAID arrays.
Don’t forget 2.5-inch mounts for SSDs. Many modern cases include dedicated SSD mounting points separate from 3.5-inch bays.
Noise considerations:
Servers running 24/7 in living spaces need acoustic management. Features like sound-dampening panels, rubber grommets for drive mounting, and fan controllers help reduce noise.
Case design significantly impacts acoustics. Enclosed designs with solid panels and foam dampening reduce noise escape but may slightly compromise cooling. If the server resides in a separate room or basement, noise becomes less critical and you can prioritize airflow over acoustics.
Networking: Connecting your server.
Network connectivity determines how quickly you can access your server’s resources. While basic gigabit Ethernet suffices for many applications, upgrading networking can dramatically improve performance.
Gigabit vs. multi-gigabit ethernet:
Most motherboards include integrated gigabit (1GbE) Ethernet, providing 125MB/s theoretical maximum throughput. This works fine for basic file sharing and streaming but becomes a bottleneck when multiple users access the server simultaneously or when transferring large files.
2.5GbE and 10GbE network cards offer substantially higher bandwidth. A 2.5GbE upgrade costs relatively little while providing 2.5x the throughput of gigabit. For serious home labs and media production environments, 10GbE delivers enterprise-class performance.
Remember that network upgrades require compatible switching infrastructure. Your router or switch must support higher speeds to benefit from upgraded server NICs.
Network card selection:
Intel network chips are preferred for server applications due to excellent driver support across operating systems, particularly important for virtualization platforms like Proxmox and ESXi. Many server-focused motherboards include Intel NICs as standard.
Realtek NICs, while common and inexpensive, sometimes have compatibility issues with certain server operating systems. For file serving and general applications, Realtek works fine, but for virtualization hosts, Intel-based network adapters prove more reliable.
Additional components and considerations.
Cooling solutions:
Server CPUs benefit from quality cooling solutions. For continuous operation, aftermarket CPU coolers often outperform stock coolers in both temperature management and noise levels.
Tower-style air coolers like those from Noctua or Arctic provide excellent cooling with minimal noise. For compact builds, low-profile coolers are necessary but can still deliver adequate cooling for efficient server CPUs.
Liquid cooling, while popular in gaming PCs, is generally unnecessary for home servers unless you’re running high-TDP processors under sustained load. Air cooling proves more reliable and simpler to maintain for typical server workloads.
Uninterruptible Power Supply (UPS):
A UPS protects against power interruptions and provides clean power to your server. For always-on systems, a UPS is essential insurance against data corruption from unexpected power loss.
Size your UPS to provide enough runtime for graceful shutdown during extended outages—typically 10-30 minutes suffices. A server drawing 200W at load needs approximately 400VA UPS capacity for basic protection, though larger units provide longer runtime.
Look for UPS units with USB or network connectivity. This allows your server to detect power failures and automatically initiate shutdown procedures before the UPS battery depletes.
Remote management:
If your server will run headless (without monitor, keyboard, mouse), consider remote management options. Many motherboards support Wake-on-LAN, allowing remote power-on. Software solutions like SSH, VNC, or Remote Desktop enable headless management.
For advanced remote management, some workstation motherboards include IPMI or similar out-of-band management systems, allowing full remote control including BIOS access and power management regardless of OS state.
Budget-conscious building strategies.
Building a capable home server doesn’t require breaking the bank. Several strategies help control costs while maintaining quality.
Repurposing existing hardware:
Older desktop computers can become excellent home servers. A surplus business PC with an Intel i5 or i7 processor, 16-32GB RAM, and room for additional drives might cost under $200 used. Add storage and perhaps a network card, and you have a capable server at minimal investment.
Prioritizing key components:
If budget is tight, invest in quality where it matters most. A good power supply and reliable storage protect your data. You can always upgrade RAM or add faster storage later, but replacing a failed PSU that damaged your motherboard costs far more.
Buying previous-generation hardware:
Last-generation processors and motherboards offer excellent value. A Ryzen 5000 or Intel 11th/12th gen system provides plenty of performance for home server applications while costing significantly less than current-generation hardware.
The used server market offers incredible value. Enterprise Xeon processors with numerous cores cost a fraction of their original price, though they typically consume more power than modern consumer CPUs.
Software considerations affecting hardware choices.
Your planned operating system and applications influence hardware requirements. Understanding these relationships helps optimize your build.
Popular home server operating systems:
TrueNAS: Excellent for storage-focused servers, TrueNAS benefits from ECC memory and works well with consumer hardware. Its ZFS implementation requires adequate RAM—generally 8GB minimum plus 1GB per TB of storage for optimal performance.
Proxmox VE: This virtualization platform runs well on diverse hardware but benefits from strong CPUs, ample RAM, and fast storage for VM images. Proxmox supports both KVM virtual machines and LXC containers.
Unraid: A flexible OS supporting mixed drive sizes and types, making it ideal for gradually expanding storage. Unraid works well on modest hardware but benefits from ECC memory for data integrity.
Debian or Ubuntu server: These general-purpose Linux distributions offer maximum flexibility. They run efficiently on minimal hardware while scaling up to support complex server configurations.
Windows server: If you’re running Windows-specific applications or prefer Microsoft environments, Windows Server requires more resources than Linux alternatives but provides familiar administration tools.
Application-specific requirements:
Media servers benefit from CPUs with hardware transcoding. Virtualization hosts need cores and RAM. Database servers prioritize fast storage. Understanding your primary applications helps focus hardware investment where it matters most.
Putting it all together: Sample build configurations.
Budget media server ($400-500):
- CPU: Intel Core i3-12100F.
- Motherboard: Budget B660 board.
- RAM: 16GB DDR4.
- Storage: 500GB NVMe boot drive + 2x4TB HDD in RAID 1.
- PSU: 450W 80+ Bronze.
- Case: Mid-tower with good airflow.
This configuration handles Plex or Jellyfin with hardware transcoding, file serving, and basic services efficiently.
Balanced all-purpose server ($750-900):
- CPU: AMD Ryzen 5 5600 or 7600.
- Motherboard: Quality B550 or B650 board.
- RAM: 32GB DDR4/DDR5.
- Storage: 500GB NVMe boot + 1TB NVMe for VMs + 4x4TB HDDs in RAID-Z2.
- PSU: 550W 80+ Gold modular.
- Case: Tower case with 6+ drive bays.
This build handles virtualization, media serving, storage, and containerized applications simultaneously.
High-performance virtualization host ($1200-1500):
- CPU: AMD Ryzen 9 7900X or Intel Core i7-13700K.
- Motherboard: Quality X670/Z790 board.
- RAM: 64GB DDR5 (expandable to 128GB).
- Storage: 1TB NVMe boot + 2TB NVMe VM storage + separate HDD array for bulk storage.
- PSU: 750W 80+ Gold/Platinum modular.
- Case: Full tower with excellent airflow.
- Additional: 10GbE network card.
This configuration runs multiple demanding virtual machines simultaneously with room for expansion.
Troubleshooting common hardware issues.
Boot problems:
If your server won’t post, verify CPU power connector, RAM seating, and all power connections. Remove all non-essential components and add back one at a time to isolate issues.
Temperature issues:
Overheating usually indicates inadequate cooling or airflow restriction. Verify fans are operational and oriented correctly. Clean dust filters regularly. Ensure cables aren’t obstructing airflow paths.
Drive detection issues:
If drives aren’t recognized, check SATA cables, power connections, and BIOS settings. Some motherboards disable specific SATA ports when M.2 slots are populated—consult your motherboard manual.
Network performance problems:
Slow network transfers might stem from poor cables (use Cat6 or better), switch limitations, or driver issues. Test with different cables and verify your network infrastructure supports your server’s connection speed.
Maintenance and long-term operation.
Building your server is just the beginning. Regular maintenance ensures reliable operation.
Physical maintenance:
Clean dust from fans, filters, and heatsinks every 3-6 months depending on environment. Dust accumulation reduces cooling efficiency and can cause overheating.
Verify drive health using SMART monitoring tools. Replace drives showing warning signs before failure occurs. Keep spare drives on hand for RAID arrays.
Software updates:
Maintain current OS patches and firmware updates. Regular updates patch security vulnerabilities and improve stability. Create backup schedules for critical data. Test restores periodically—backups you can’t restore are worthless.
Conclusion: Building your ideal home server.
Building a home server combines technical knowledge with careful planning. By understanding your requirements and selecting appropriate hardware, you create a system tailored to your exact needs while maintaining upgrade flexibility.
Start with clear goals. Define your primary use cases and budget. Research components thoroughly. Don’t rush the planning phase—a well-planned build avoids costly mistakes and component incompatibilities.
Focus on reliability for components handling your data—power supply, storage, and motherboard. These form your server’s foundation. You can upgrade RAM, add drives, or swap CPUs later, but replacing failed core components is expensive and disruptive.
Power efficiency matters for always-on systems. Calculate your server’s ongoing electricity costs. Sometimes spending extra on efficient components pays back through reduced operating costs.
Finally, start conservatively and expand gradually. You can add drives, upgrade RAM, or install additional services as needs evolve. A well-built home server provides years of reliable service while adapting to changing requirements.
The journey from components to functioning server teaches valuable skills and provides infrastructure for countless projects. Whether you’re streaming media, hosting applications, or learning about enterprise IT, your home server becomes the foundation for digital independence and creative experimentation.
Remember: Server building is iterative. Your first build won’t be perfect, but each project teaches lessons for the next. The home server community is welcoming and helpful—don’t hesitate to seek advice from forums, Discord servers, and subreddits dedicated to home lab enthusiasts. Even my first built wasn’t that perfect.
Leave a Reply